In November while working on my November Gratitude Project, I was inspired to do a small set of 3 cards so far.  With the November Gratitude Card, I was inspired not only by the stamping technique, but more importantly by the masking technique.  With that in mind, I decided to go ahead and make 2 more cards - again so far to start a collection or set of cards inspired by masking and stamping.  In the first and third cards, I used paint, and in the second, more colorful card, I used Tim Holtz distressed inks.  It never occured to me until creating card #2 that I truly enjoy using the distress inks and I believe that to be one of my favorite things to use, it's almost like the project isn't complete without a little distressing.  :)  Well, below are the card.  I hope you are inspired by them.  Enjoy!

Happy Scrappin'
~NJ
 
So a few months back – more like this summer, Michael’s had some clear decorative tape on sale for $0.50 so I bought 4 rolls (pink, green, purple and blue) thinking I would be able to use them at some point or another.  Well that point finally came.  I was making a card and thought the blue decorative tape would be nice to have as an added strip along the side of the card….then I got to thinking…what if I covered the whole card with this tape….So here comes the card you see below.  After cutting my card to 4.5” x 5.25”, I covered the entire front portion of the card with this decorative tape.  I must say this tape is rather sticky and DOES NOT leave room for error.  After taping the front of the card, I pulled out a monogram stamp from the dollar spot at Michael’s with my first initial on it – stamped the image onto white cardstock with StazOn Jet Black ink, let it dry and then cut it out and glued it on top of the front of the card.  After doing this, I wanted my monogram letter to be glossy – just like the decorative tape.  So I decided to put some Glossy Accents on top of the monogram letter and here is the final product below.  Hope you like it.  I think it would be cool to make a whole series of cards using all the colors of the decorative tape that I purchased.  Well, until next time…

Happy Scrappin’!

~ N
 
I was happy that over the weekend, I was able to take some time out to create these three simple Valentine's Day cards.  The first two cards took less than 10 minutes due to the fact that I only used scraps I had on hand and the last card took about 10 minutes give or take.  With this card, I also used scraps, however, there was a bit more cutting and punching and stamping involved.

Enjoy and again Happy Valentine's Day!

~NSDesigns
 
Since this is the day that we celebrate "Love" and all the things that come with it,  I just wanted to wish everyone a very special Happy Valentine's Day 2011!  And with that being said, I would also like to leave these words by Elizabeth Barret Browning:

How Do I Love Thee? Let me count the ways.
I love thee to the depth and breadth and height
My soul can reach, when feeling out of sight
For the ends of Being an ideal Grace.
I love thee to the level of everyday's
Most quiet need, by sun and candlelight.
I love thee freely, as men strive for Right;
I love thee purely, as they turn from Praise.

I love thee with the passion put to use
In my old griefs, and with my childhood's faith.
I love thee with a love I seemed to lose
With my lost saints,--I love thee with the Breath,
Smiles, tears, of all my life!--and, if God choose,
I shall but love thee better after death.

 
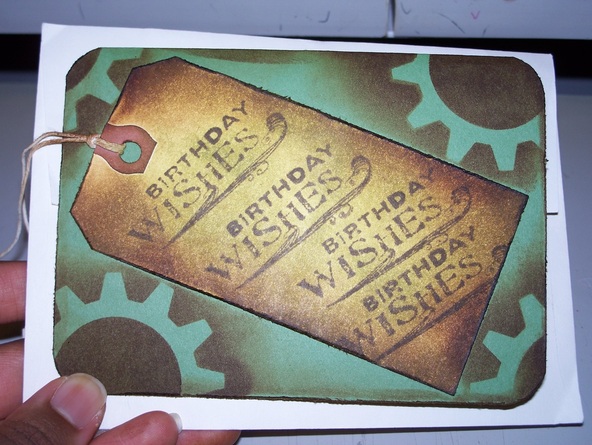
I really think this card took me about 5 minutes to make.  We were in a rush, had to make a card really quick for one of our good friends and this is what I came up with.  Not too much too it, I did the masking technique and distress inks, as well as distressed the edges.  On the bookmark that's in the center, I did the same thing as far as distressing the edges and stamping Birthday Wishes.
Picture
 
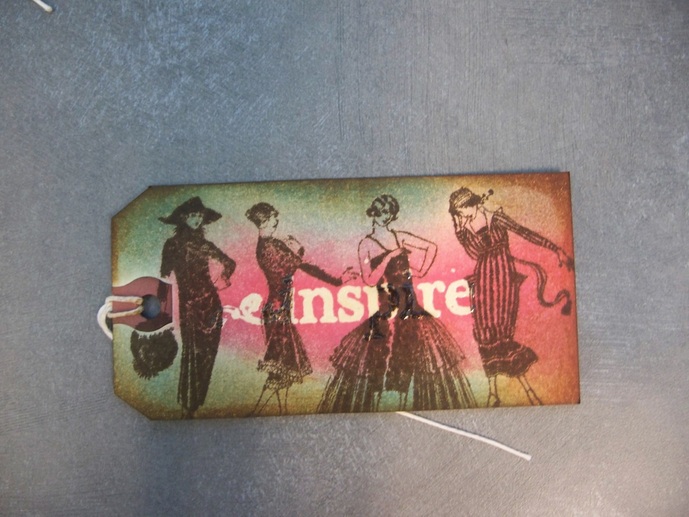
I love this fashion throught the decades stamp, so I thought it would be a great/fun idea to make a bookmark out of it.  What I did learn while doing this bookmark is that I don't think I'll be mixing the ColorBox Chalk Ink with my distress inks again.  But overall, I like the general look and feel of this bookmark.
Picture
 
On this card, I decided to combine various techniques to create a card that I was ultimately very pleased with.  On this card, I embossed the background using clear embossing powder.  I then distressed the cardstock using Tim Holtz Distress Inks.  After doing those things, I stamped the image of a butterfly onto cardstock, cut it out and colored it using Copic Markers.  I used 3-diminisional squares to give the butterfly that 3-D effect.  Then in the center of the butterfly, I placed pearl embellishments...08 to be exact - in honor of the bond that the person who was receiving this card and I share.  :)  Lastly I stamped the "thankful for you!" message in the lower right hand corner of the card and made flying dotted marks to show in what direction the butterfly came from.  All-in-all I really enjoyed making this card, and putting so many elements into one small package. 
Jennifer McGuire is a wonderful scrapbooker with a wealth of great inspiration.  Below are two video links - one regarding copic markers - and butterflies and the other is from her Summer 2009 Two Peas in a Bucket Think Inking Class - on Paint Dabbers.  Hopefully these video links will be an inspiration to you as you get your creative juices flowing.
http://jennifermcguireink.typepad.com/my_weblog/2010/01/my-entry.html?utm_source=feedburner&utm_medium=email&utm_campaign=Feed%3A+typepad%2F1204932784s6756%2Fmy_weblog+%28Jennifer+McGuire%2C+ink.%29&utm_content=Yahoo%21+Mail - copic markers video/blog page

http://www.twopeasinabucket.com/cg_display.asp?cmd=display&seed_id=29943 - Think Inking Class - Week 3:  Paint Dabbers Part II
 
I had fun using the distressing technique on this card.  I feel like it adds to the card itself...along with the butterfly for added dimension.