Don’t worry, for my Month of Gratitude Projects, I hope to have Project 2 of 5 up tomorrow. Last week was a very trying week for me and there wasn’t too much I was able to get done. This week has been a little bit better, so I’m trying to get caught up on everything now.
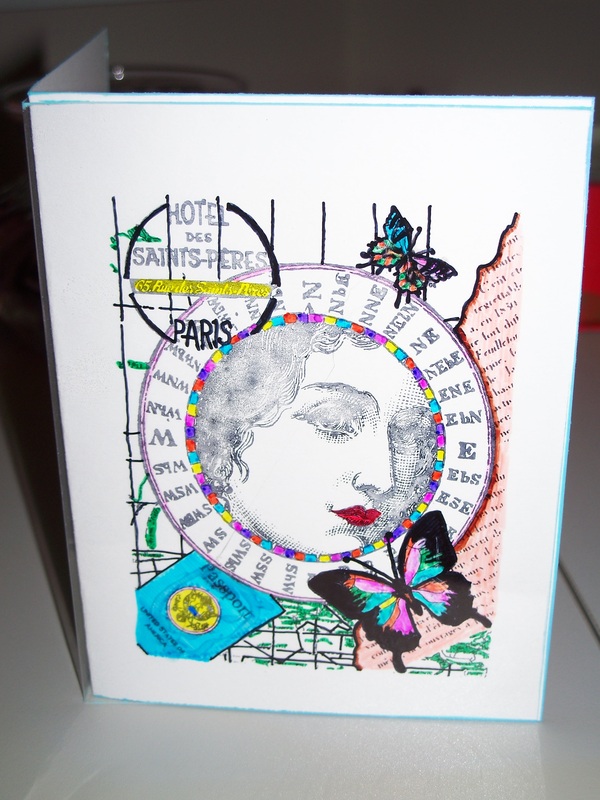
So for today, since we’re all just about – ALMOST into the holiday spirit, I wanted to share a transparency card I made. Below, you will find the steps in completing the transparency card, this would be a fun project to do possibly for holiday cards. And speaking of holiday cards, have you all been keeping up with Kristina Werner’s Holiday Card Series 2010 – one – no, two words, AWESOME!
So back to the transparency card steps:
Materials needed:
Create something nice for that special someone.
Happy Scrappin!
So for today, since we’re all just about – ALMOST into the holiday spirit, I wanted to share a transparency card I made. Below, you will find the steps in completing the transparency card, this would be a fun project to do possibly for holiday cards. And speaking of holiday cards, have you all been keeping up with Kristina Werner’s Holiday Card Series 2010 – one – no, two words, AWESOME!
So back to the transparency card steps:
Materials needed:
- 8x10 transparency folded to create a 4x5 card.
- 8x10 piece of white or cream cardstock folded to create a 4x5 card.
- Desired Stamp.
- 2 Ink pads – one should be a black ink pad. I used Jet Black Staz-On ink it tends to stick better on the transparency.
- Sharpie Markers
- Cut and score your transparency to the desired size – whatever size you would like your card to be. I personally like to create 4x5 greeting cards.
- Using selected stamp, stamp the image on the non-glossy side of the transparency using the black ink pad.
- Color the stamped image the desired colors using the Sharpie Markers.
- Let Dry. This should take no more than 5 minutes.
- Get white/cream piece of cardstock and place inside the transparency.
- Glue the back side of the cardstock to the transparency using a clear glue. You can glue only the four corners so the glue doesn’t stand out on the back of the card, or only glue the inside fold of the cardstock to the inside fold of the transparency. I believe I used Glossy Accents since the bond is pretty permanent.
- With the other ink pad, ink the edges of the transparency and cardstock.
- Mail your greeting card….or keep it for yourself.
Create something nice for that special someone.
Happy Scrappin!

 RSS Feed