Ali Edwards Week In The Life Project ended for me last Monday.  This week, I've been working on putting my album together.  In the past I've done 12x12 as well as 8.5x11 Albums.  Out of the two I liked the 12x12 album better.  I felt that when I did the 8.5x11 Album that things seemed a bit crowded and cluttered.  I don't know maybe I just put too many items into my album. 

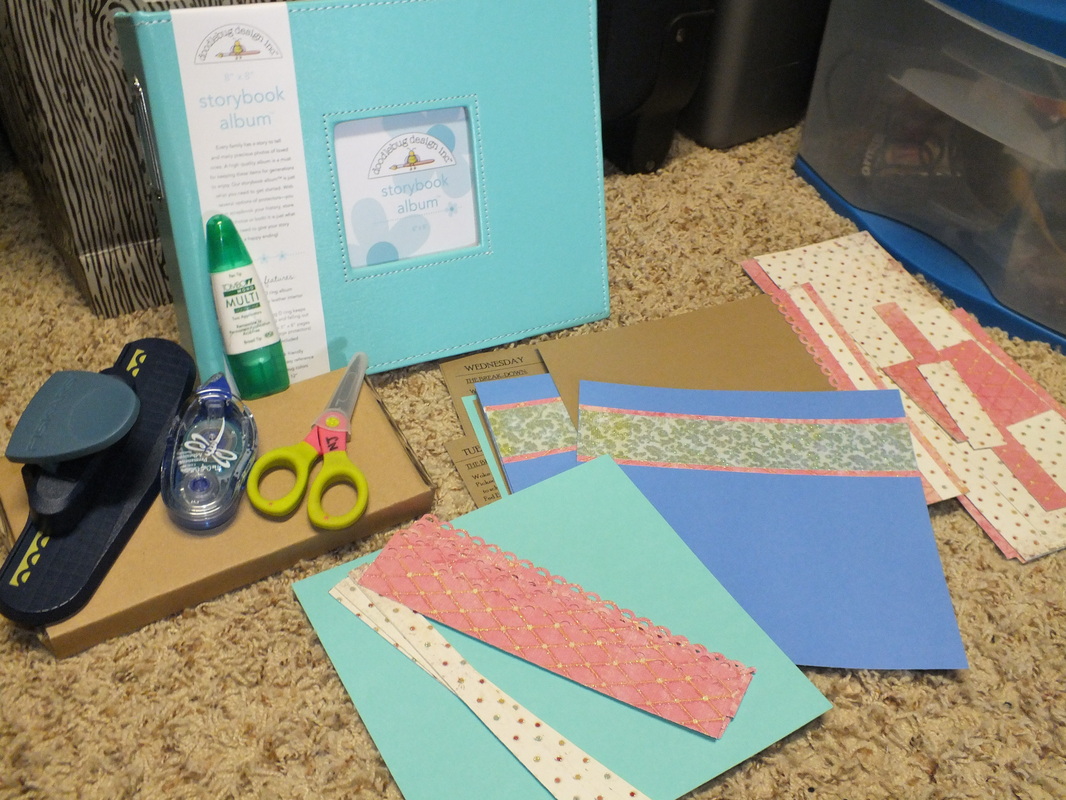
So this year, I decided to embark on a new idea and go with an 8x8 album.  So far, so good.  I've enjoyed putting the album together.  I decided to go with the 8x8 album, because I felt as though I might not collect as many items as I have in past years - this assumption turned out to be correct.  I still focused on a brief synopsis of my day as I did in my 8.5x11 Album in 2010, and I also have focused on Observations, Favorite Moment(s), Food and Gratitude(s).  Today I printed out my photos and look forward to completing this album.

If you've never participated in this album before, I highly encourage it.  I've been doing it since 2007 and I still enjoy going back every once in a while to look at these albums and see how much things have changed over the years.  So on that note, I think I better go back to working on this album!

Happy Scrappin'!

-NJ 
 
Although I have a tool to make things a lot easier for this technique, I must say I still had a hard time debating on which Embossing Folder to use.  First I picked out my cardstock and then selected my embossing folder before sending it though my Sizzix Texture Boutique Embossing Machine.  After embossing the card front, I used my craft sheet and applied Tim Holtz Dusty Concord Distress Ink to the card.  Lastly I finished the card off with some embellishments I had on hand and stamped the sentiment onto the embellishment.

I will have the materials used to make this card and Monday's card up tomorrow, so
 
My first card for Scrappy Monday is a Mother's Day card I made using some scraps and some Embellishments that I had on hand.  I really just picked five pieces of scraps I had in my scrap bin.  Cut them down to the size of the card and topped them off with some embellishments.  I had a good time making this card, it was quick and easy.  So go to your craft spot and pull out those scraps and make a card for a special Mom in your life. 

See you tomorrow where I will showcase a card for Technique Tuesday!  I wonder what time of technique will be discussed........

Happy Scrappin'!
~NJ
 
First off, I hope that everyone had a wonderful Cinco de Mayo Weekend and a great and productice National Scrapbooking Day!

This week we're going to throw in a little this and that.  I will be putting together my Week In The Life 2012 Album (so I will be sharing my thoughts on that process), as well as keeping everything all about Momma!  Meaning each day this week I will be presenting a Mother's Day card.  So if you haven't all ready either go out and purchase a card for your Mother's  or other Mother-Like figures in your life, or create a card for them.

First up on Monday, we'll call this Scrappy Monday - let's purge through our Scraps!!!!  I will be focusing on a card using scraps from my scrap bin. 

I hope this week you will be inspired by something on my blog. 
 
Hello everyone! I know I've been off the radar the last few months.  Things have just been getting busy with the girls as I try hard to make time for everything, me included.  I have a few things I the pipeline that I hope to unveil in the next two weeks.  Also last week I participated in Ali Edwards Week In The Life Project.  I started last Tuesday and finished today.  I plan to put my album together and present that online next week.  If you would like to know more about The Week In The Life Project check out http://www.aliedwards.com
Also, this Saturday is National Scrapbboking Day - do any of you have any fun things planned? If so, leave a comment below.  As for me, I plan to participate in Big Picture Classes Creative Crop.  
That's all for now.
~NJ

 
Last year I gave this "One Little Word," Challenge a go ahead....but I did fall short.  My word for 2011 was WRITE.  Although I wrote more than I had in previous years, I felt as though I didn't really take ownership of the word like I could have.  So I've been thinking a lot  over the past few about whether or not I want to participate in the challenge this year or not....I decided I would give it a try again. 
This year my word will be RECORD....Record, because after much thought and consideration about the One Little Word Challenge, this is the word that kept popping up...RECORD.  Record a snipet of my life daily....whether through photo, one word to describe the day, or an overview of my day in general...just RECORD.  I'm going to give this a try and post something on the 1st of each month charting my progress in hopes that this will hold me more accountable.  So with that being said, my One Little Word for 2012 is RECORD. 
If you would like to know more about this concept or to join an online class taught by Ali Edwards on this Challenge click here.  If you would like to join me on this quest of One Little Word 2012 please do and share your word below in the comments section as I would love to know what your One Little Word of 2012 is! 

 
I just wanted to take this time to tell everyone Happy New Year!  Thank you to everyone who has stopped by and viewed my blog.  I hope to do some fun and exciting postings over this new year and hope that you all will continue to visit and leave comments as you see fit.

I'm totally looking forward to 2012 and all of the blessings that God has in store for me and my family!  Wishing everyone nothing but God's best in 2012!
 
And the last card of the series is this Christmas card, where I embossed the background of the card, on the cream colored card I added a little glitter to the embossed background.  Then I cut out 1" squares from some patterned paper, and glued those to the front of the card.  On the solid pieces I added Holiday/Christmas sentiments, embossing the "Merry Christmas."  And finished off by rounding the corners.
I hope you all enjoyed my first Christmas Card Series and were able to come up with some cards of your own.  Merry Christmas and Happy Holidays to you all!

Materials Used:
Michael's Cream & Kraft Recollections Cardstock
Happy Holidays 48 Paper Pack with Glitter from Hobby Lobby
Making Memories  Tinsel 8x8 Specialty Paper Pack
Scrap Paper (green and light green cardstock)
White Embossing Powder
Blue Glitter for Cream Colored Card
Versmark Watermark Stamp Pad
Hero Arts Stunning Snowflakes - #S5069
Crop-A-Dile Corner Chomper
 
This card was really easy and straight to the point.  Again, cream and kraft paper were used.  I thin selected a piece of cardstock form the My Minds Eye Lost and Found Paper pack and used border punches on each and then added some Christmas chipboard to the center and finish out he card by rounding out the corners on the kraft card only.

Materials Used:
Michael's Cream and Kraft Recollections Cardstock
Crop-A-Dile Corner Chomper
My Mind's Eye Lost & Found Union Square 6x6 Designer Cardstock Paper Pad
K and Company Christmas Chipboard
Fiskars Border Punch - Apron Lace
EK Success Dotted Scallop Edger Punch
 
"Be Merry & Bright!"  Talk about a quick and simple card.  Here  I stamped the image of the Christmas Trees on a blue piece of scrap cardstock.  Next, I inked the edges with white ink.  I think this effect give the card a snow like effect - like the wind is blowing the snow around the trees...and some glitter glue for that star above one of the trees.  I used dimensional adhesive to place the stamped image unto a red piece of cardstock.  After that, I thought it would be great to add some strips of patterned paper to the left of the Christmas Trees.  Next I added the Christmas sentiments and finished the card off with some faux stitching and rounding of the right upper and lower corners.    

Materials Used:
Happy Holidays 48 Paper Pack with Glitter - from Hobby Lobby #CMAS0852
Making Memories Tinsel 8x8 Specialty Paper #33544
Red Lined Cardstock from Bazzill
Blue Cardstock from stash of scraps
4Klear Stamping-Clear Stamps (purchased at hobby lobby) - "be merry & bright" and Christmas Tree images
Crop-A-Dile Corner Chomper
Studio g Red Glitter Glue
Frost White ColorBox Pigment Ink #15080
PrismaColor Premier Assorted Markers